Summer Star Quilt
- By American Quilter's Society
- Feb 15, 2022


Summer Star
72″ x 72″
Fabric Requirements
Click the fabrics below to order yardage of our American Made Brand colorway.
White - 1 1/4 yards
Light Denim - 2 yards
Blue (Center Star) - 2/3 yard
Dark Blue - 1 2/3 yards
Navy - 3/4 yard
Dark Yellow - 1 yard
Binding - 2/3 yard
Backing - 4 1/2 yards
Cutting Instructions
From the white fabric, cut:
(8) 6 1/2" x 6 1/2" squares
(4) 12 1/2" x 12 1/2" squares
From the light denim fabric, cut:
(32) 7" x 7" squares
(12) 6 1/2" x 6 1/2" squares
From the blue fabric, cut:
(4) 7" x 7" squares
(1) 12 1/2" x 12 1/2" squares
From the dark blue fabric, cut:
(24) 7" x 7" squares
(16) 6 1/2" x 6 1/2" squares
From the navy fabric, cut:
(12) 7" x 7" squares
From the dark yellow fabric, cut:
(4) 6 1/2" x 12 1/2" rectangles
(8) 7" x 7" squares
For the binding, cut:
(8) 2 1/2" x width of fabric strips
Summer Star Fabric Pull Ideas
We have some ideas for different color ways below. Get inspired to create your own color ways and plan out your fabrics with a handy planning page!
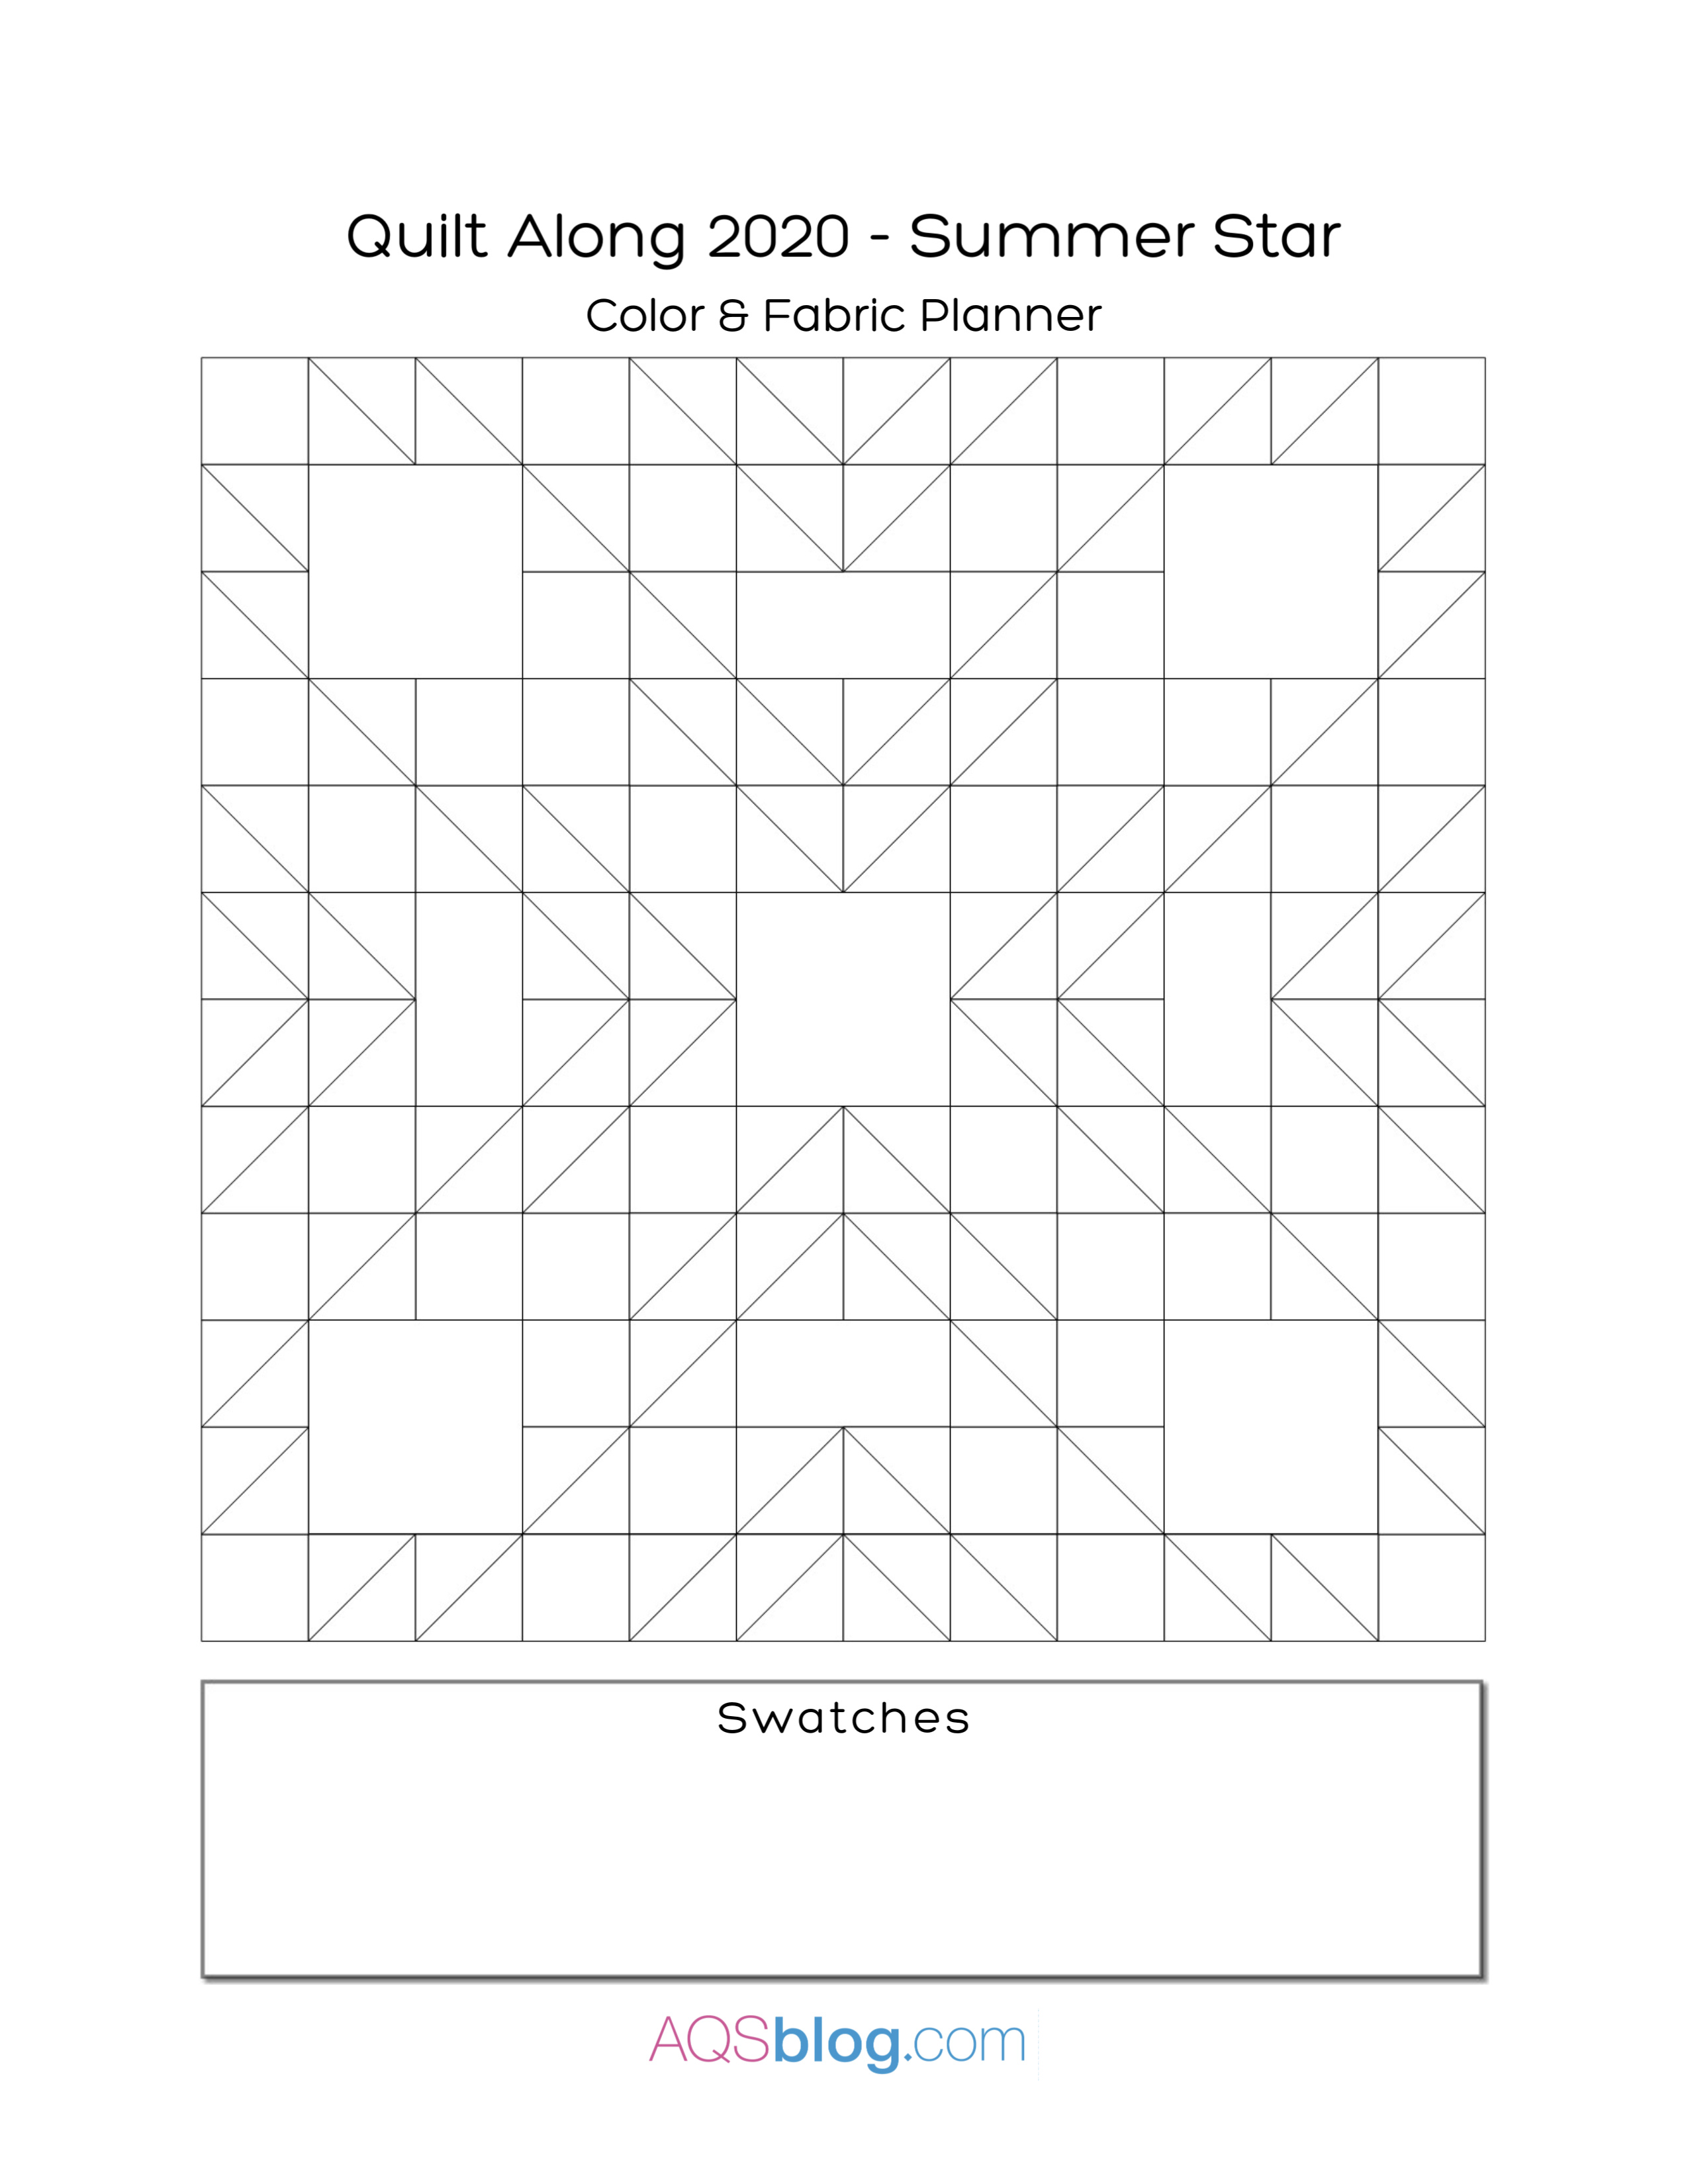
Click Here to download the Summer Star Color & Fabric Planner.
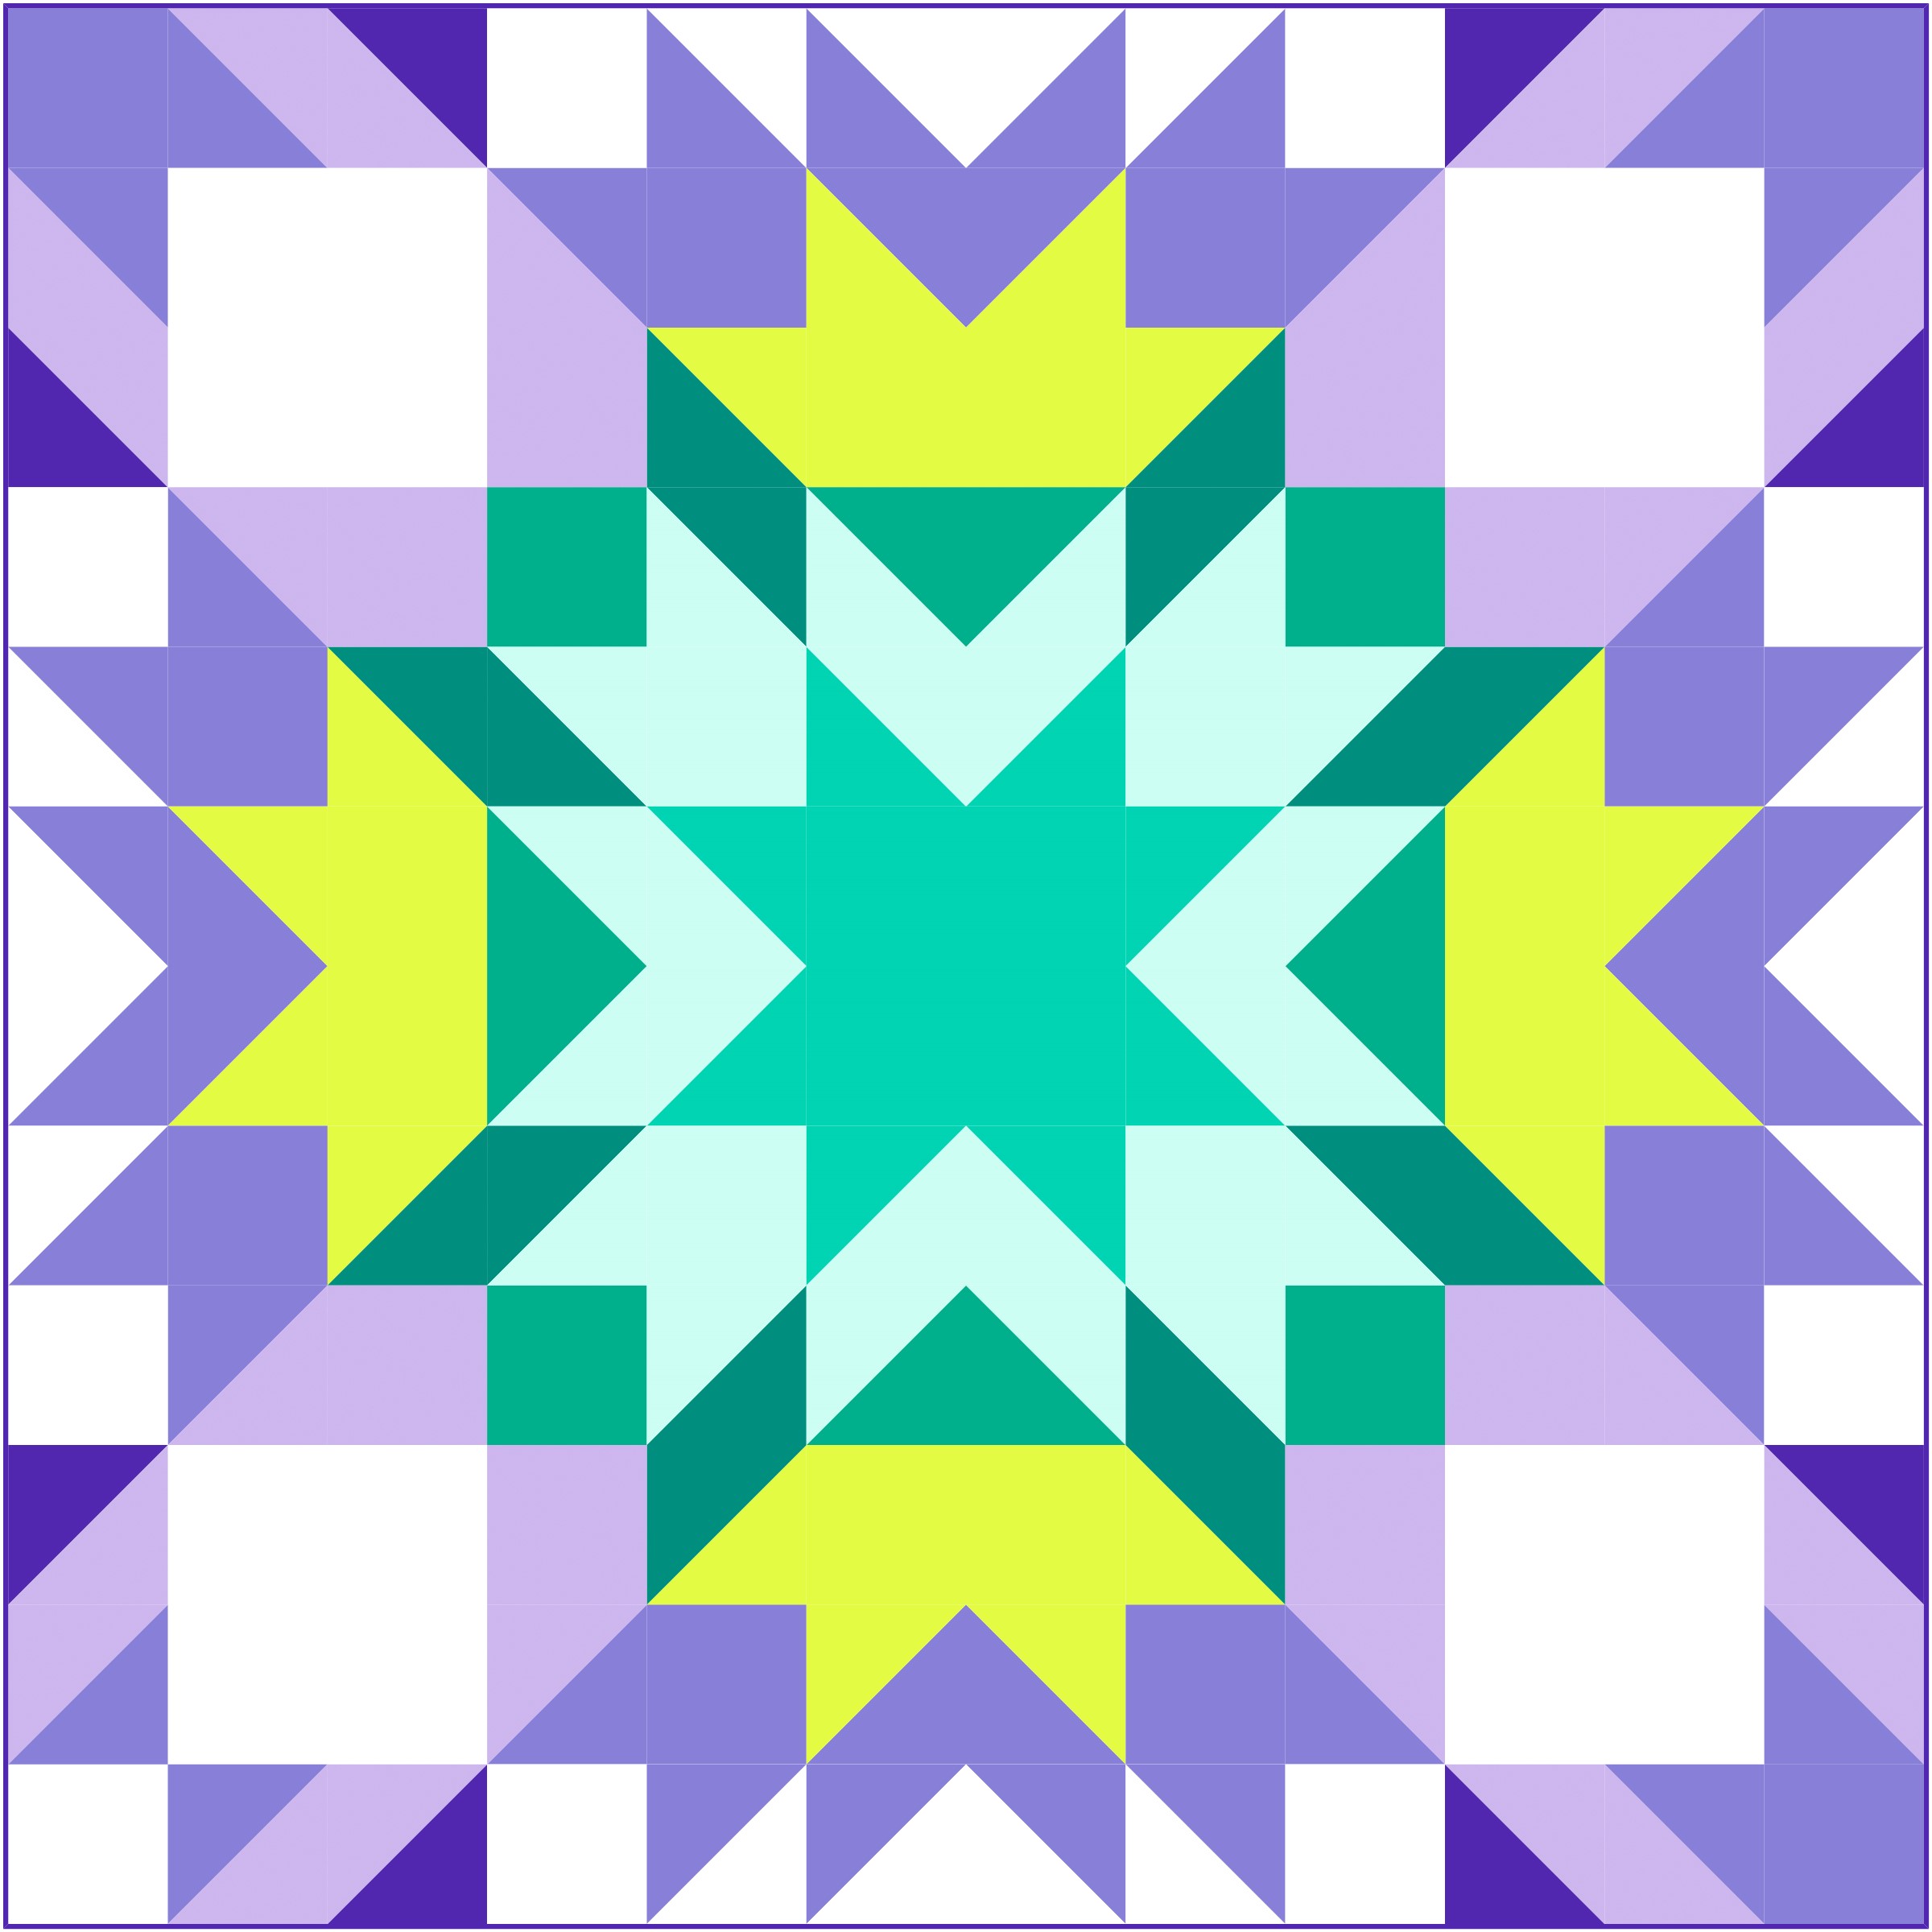
Summer Star is such a fun quilt for showing off prints, playing with color, and experimenting with value. What are your ideas?
Here's it is in lovely purple and green.
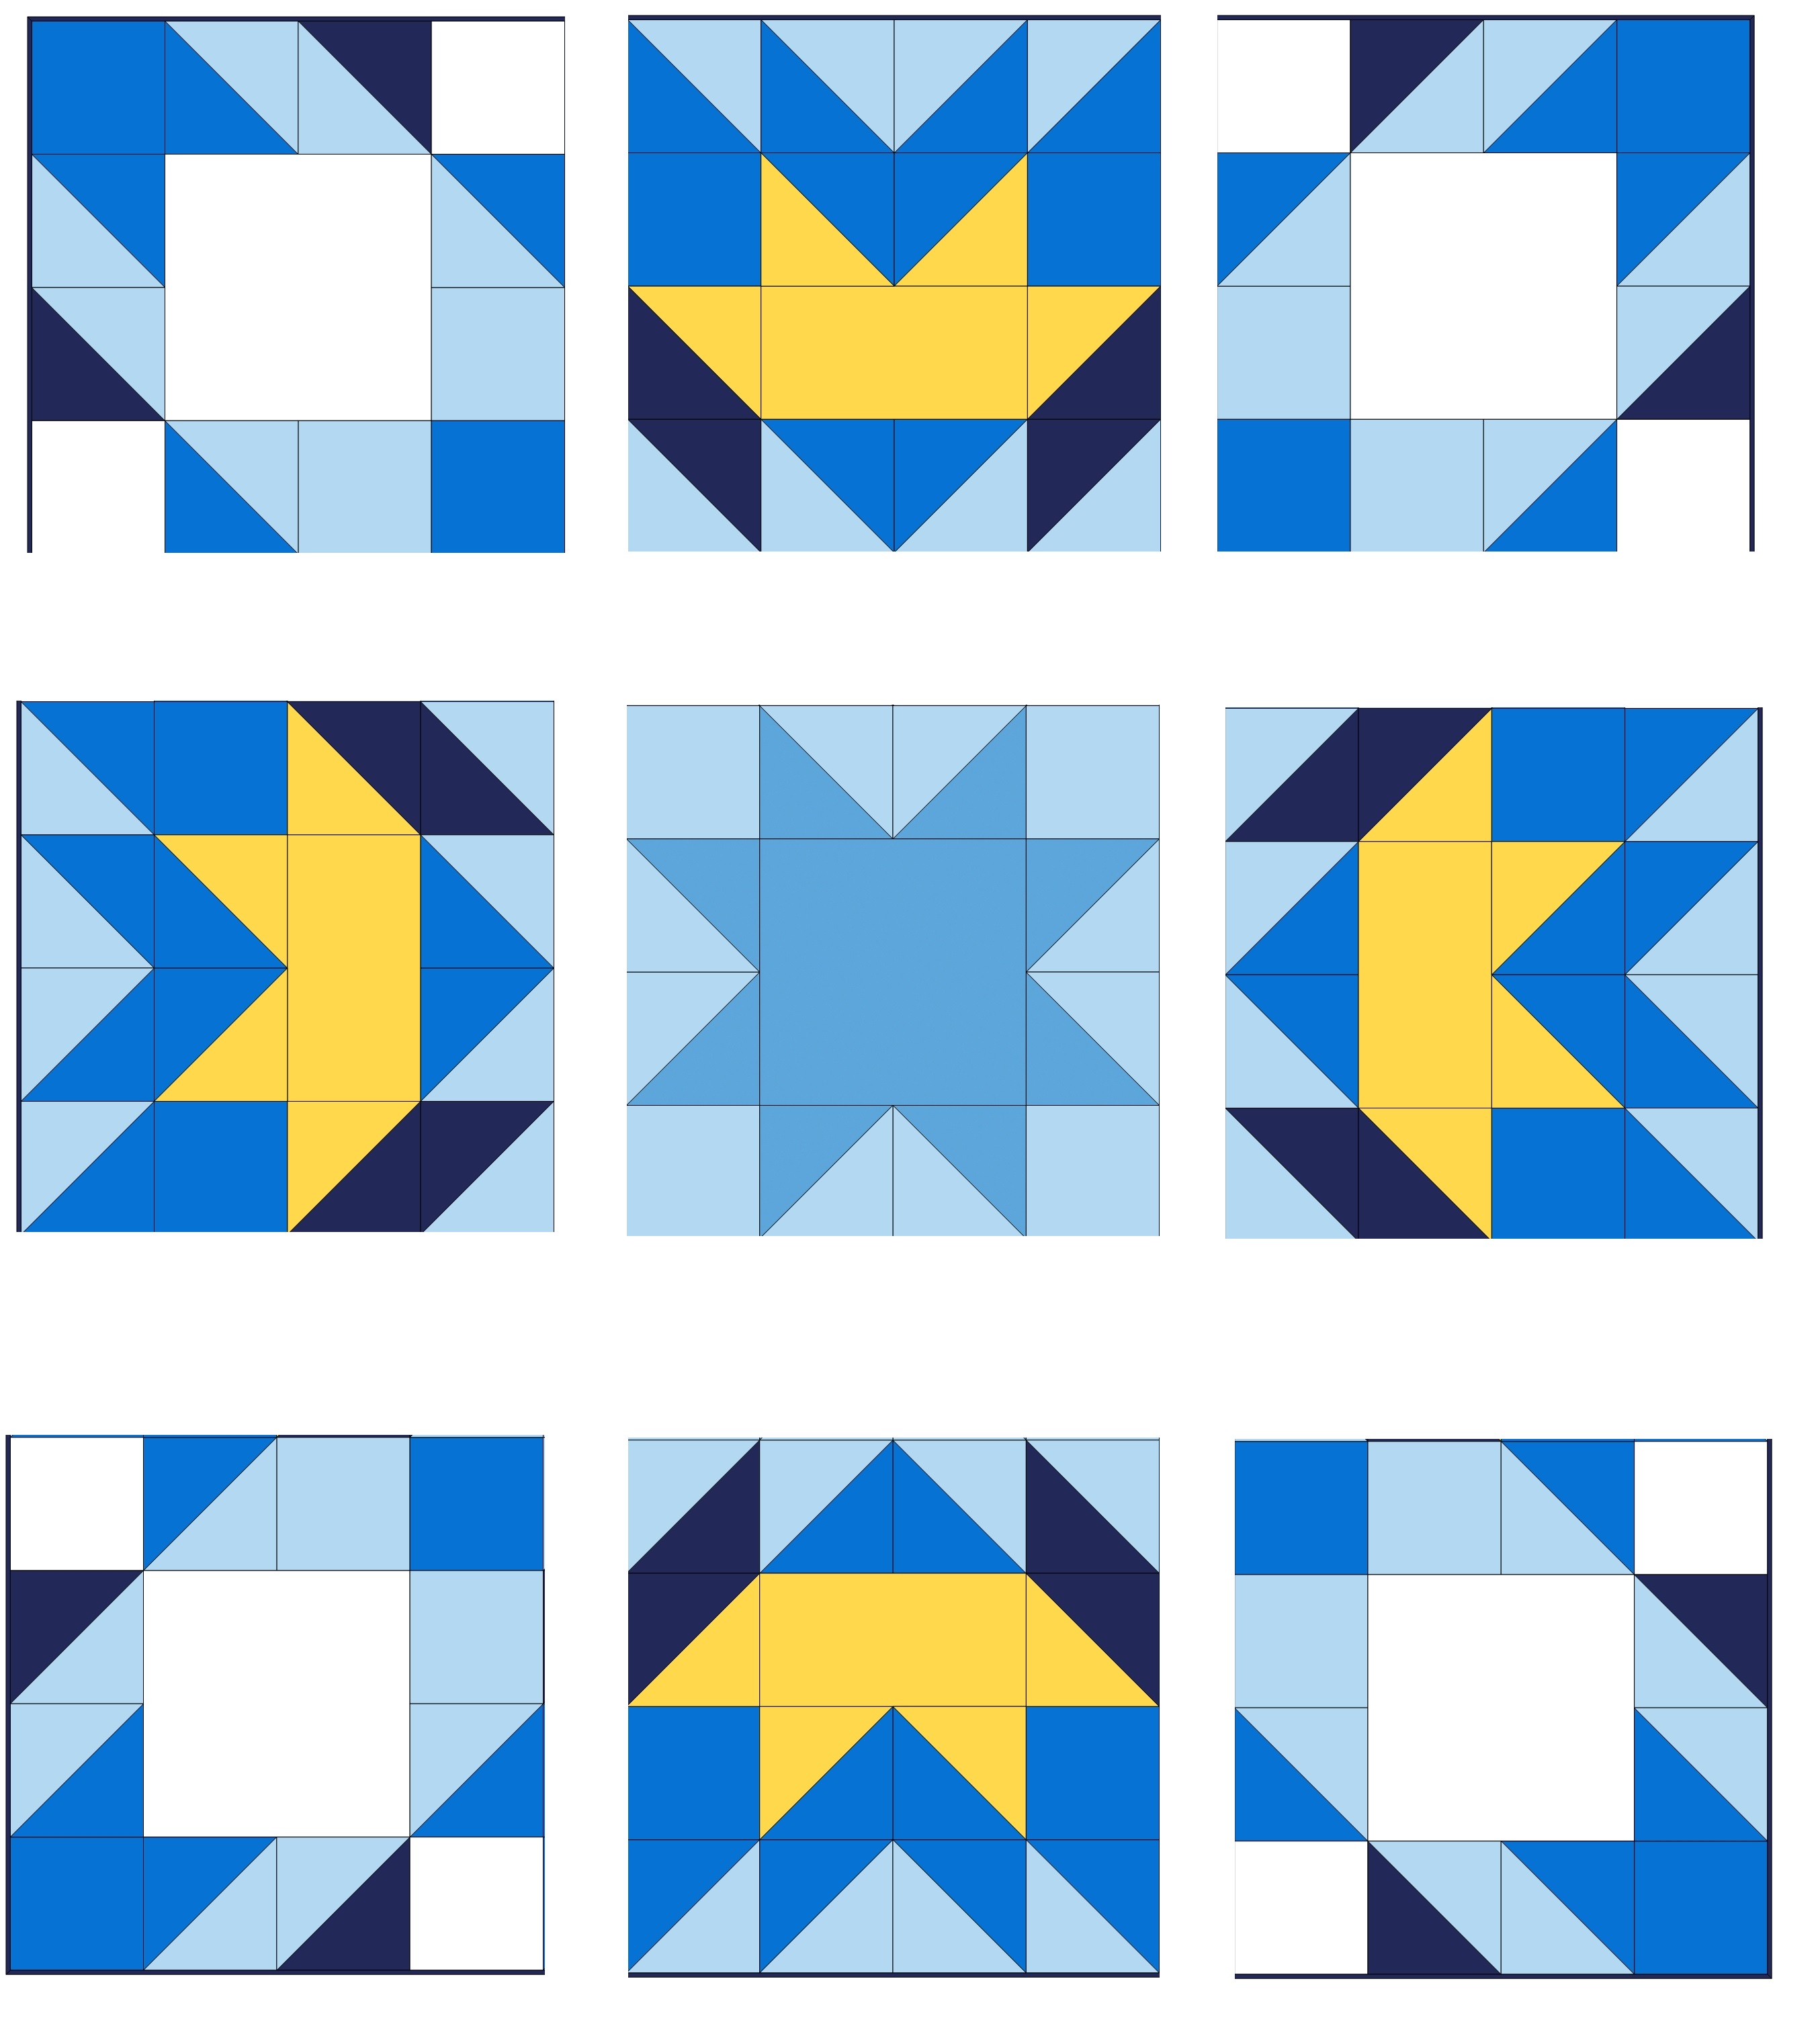
Unit Assembly
For Summer Star you will need to make the following Half Square Triangles:
Light Denim/Dark Blue – 40
Light Denim/Navy – 16
Light Denim/Blue – 8
Dark Yellow/Dark Blue – 8
Dark Yellow/Navy – 8
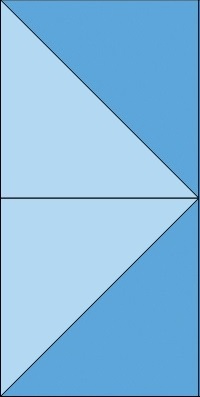
Draw a line on the backside of a 7″ square diagonally. Lay right sides together with the other square. Sew a 1/4″ from each side of the drawn line. Cut apart on the line. Press and trim to 6 1/2″.
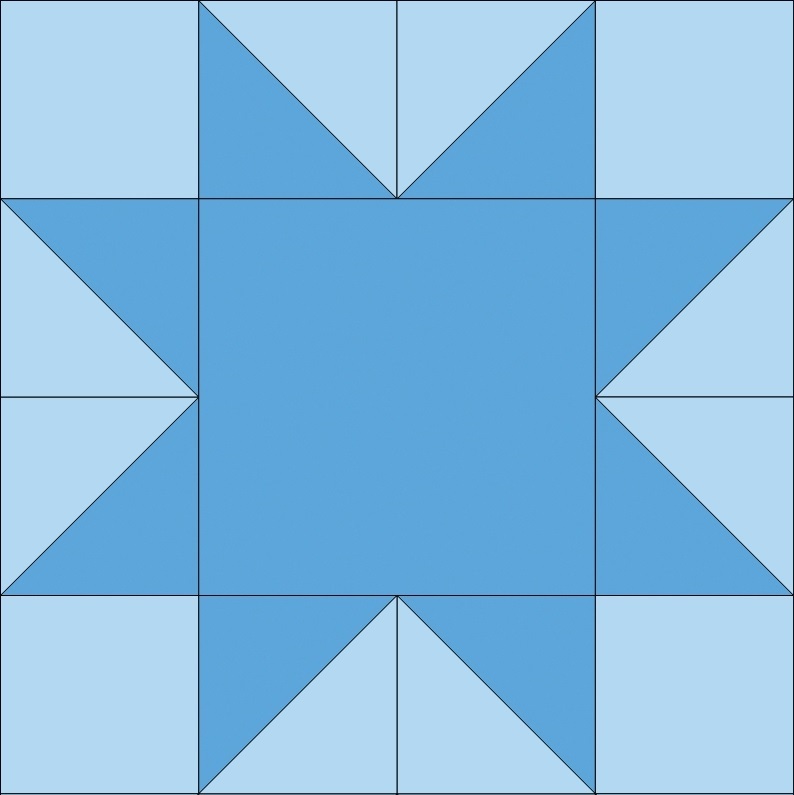
Center Star
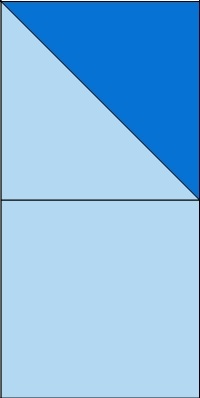
To make the center star, sew two light denim/blue HST (half square triangles) together as shown below.
Unit measures 6 1/2″ x 12 1/2″. Make 4.
Sew two of the previous unit to each side of the blue 12 1/2″ square as shown below.

Unit measures 24 1/2″ x 12 1/2″. Make 1.
Sew a light denim 6 1/2″ square to each end of the two remaining previously made HST units as shown below.

Unit measures 24 1/2″ x 6 1/2″. Make 2.
Sew the previously made units to the top and bottom of the center section of the star as shown below.
Center Star measures 24 1/2″ square. Make 1.
Corners
Sew a light denim/dark blue HST to a light denim/navy HST as shown below.
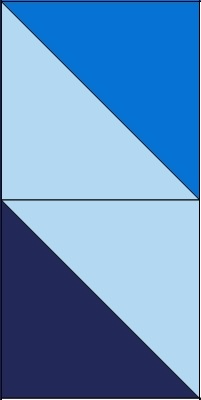
Unit measures 6 1/2″ x 12 1/2″ rectangle. Make 4.
Sew a light denim/dark blue HST to a light denim 6 1/2″ square as shown below.
Unit measures 6 1/2″ x 12 1/2″ rectangle. Make 4.
Sew each of the previous units to the sides of the white 12 1/2″ square as shown below.
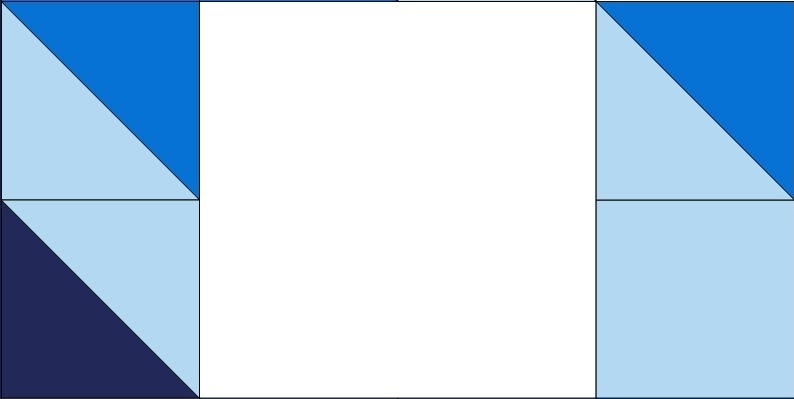
Unit measures 24 1/2″ x 12 1/2″ rectangle. Make 4.
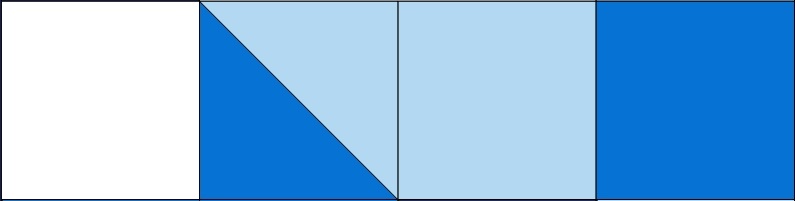
Sew a light denim/dark blue HST to a light denim/navy HST as shown below. Sew a dark blue 6 1/2″ square to one end and a white 6 1/2″ square to the other as shown below. This makes the top row.

The top row measures 24 1/2″ x 6 1/2″ rectangle. Make 4.
Sew a light denim/dark blue HST to a light denim 6 1/2″ square as shown below. Sew a white 6 1/2″ square to one end and a dark blue 6 1/2″ square to the other as shown below. This makes the bottom row.
The bottom row measures 24 1/2″ x 6 1/2″ rectangle. Make 4.
Sew the top row to the top of the corner section previously made as shown below. Sew the bottom row to the bottom of the corner section previously made as shown below.
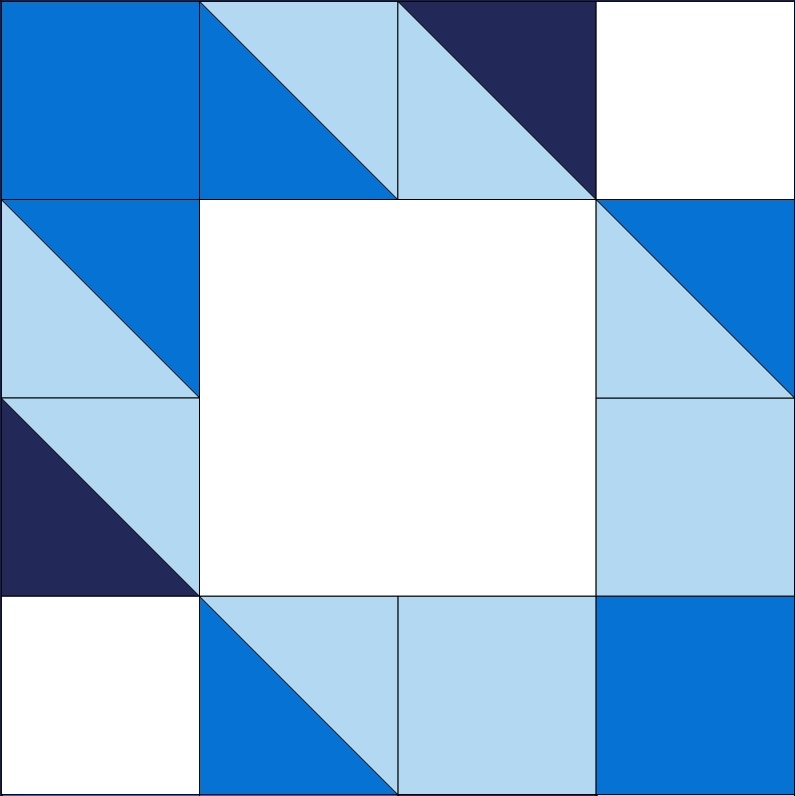
Corner measures 24 1/2″ square. Make 4.
Middle Sections
Sew four light denim/dark blue HST together as shown below. This makes Row A.
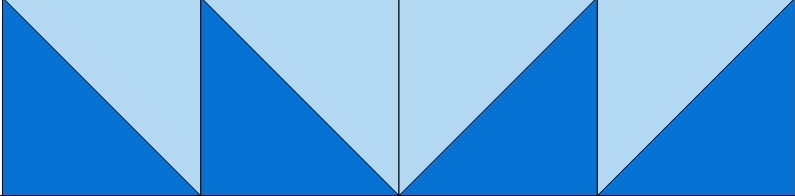
Row A measures 24 1/2″ x 6 1/2″ rectangle. Make 4.
Sew two dark blue/dark yellow HST together as shown below. Sew a dark blue 6 1/2″ square to each end. This makes Row B.

Row B measures 24 1/2″ x 6 1/2″ rectangle. Make 4.
Sew a navy/dark yellow HST to each end of the dark yellow 12 1/2″ x 6 1/2″ rectangle as shown below. This makes Row C.
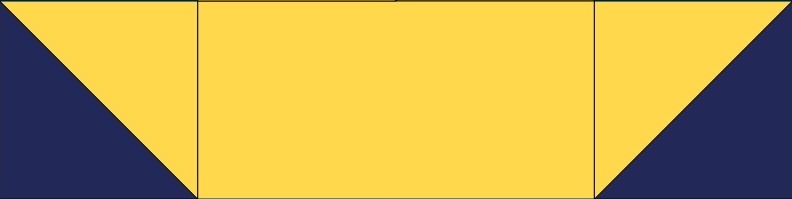
Row C measures 24 1/2″ x 6 1/2″ rectangle. Make 4.
Sew two light denim/dark blue HST together as shown below. Sew a light denim/navy HST to each end as shown below. This makes Row D.

Row D measures 24 1/2″ x 6 1/2″ rectangle. Make 4.
Sew rows A, B, C, and D together as shown below.
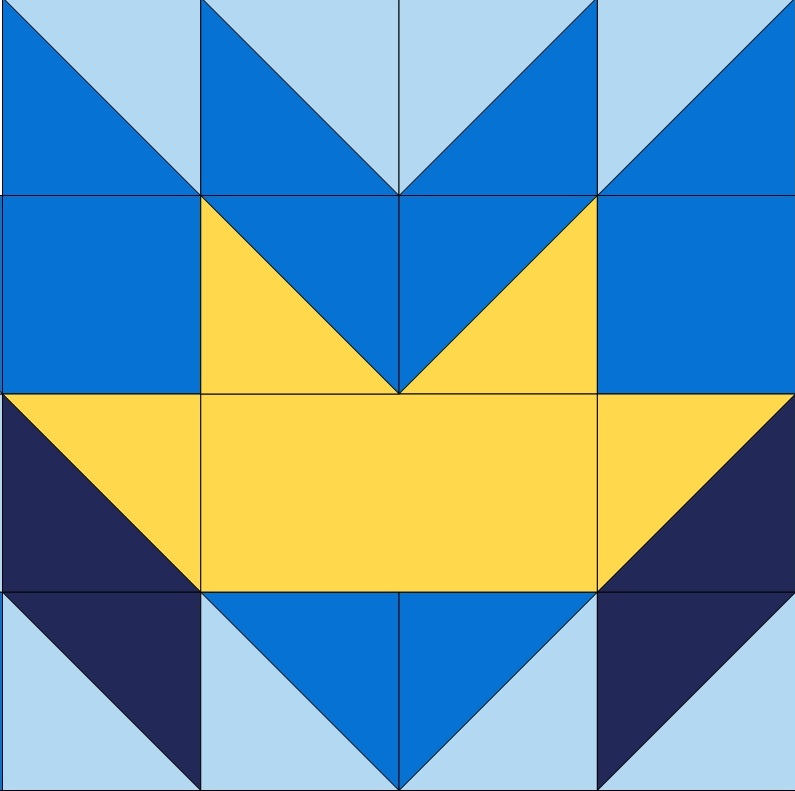
Middle section measures 24 1/2″ square. Make 4.
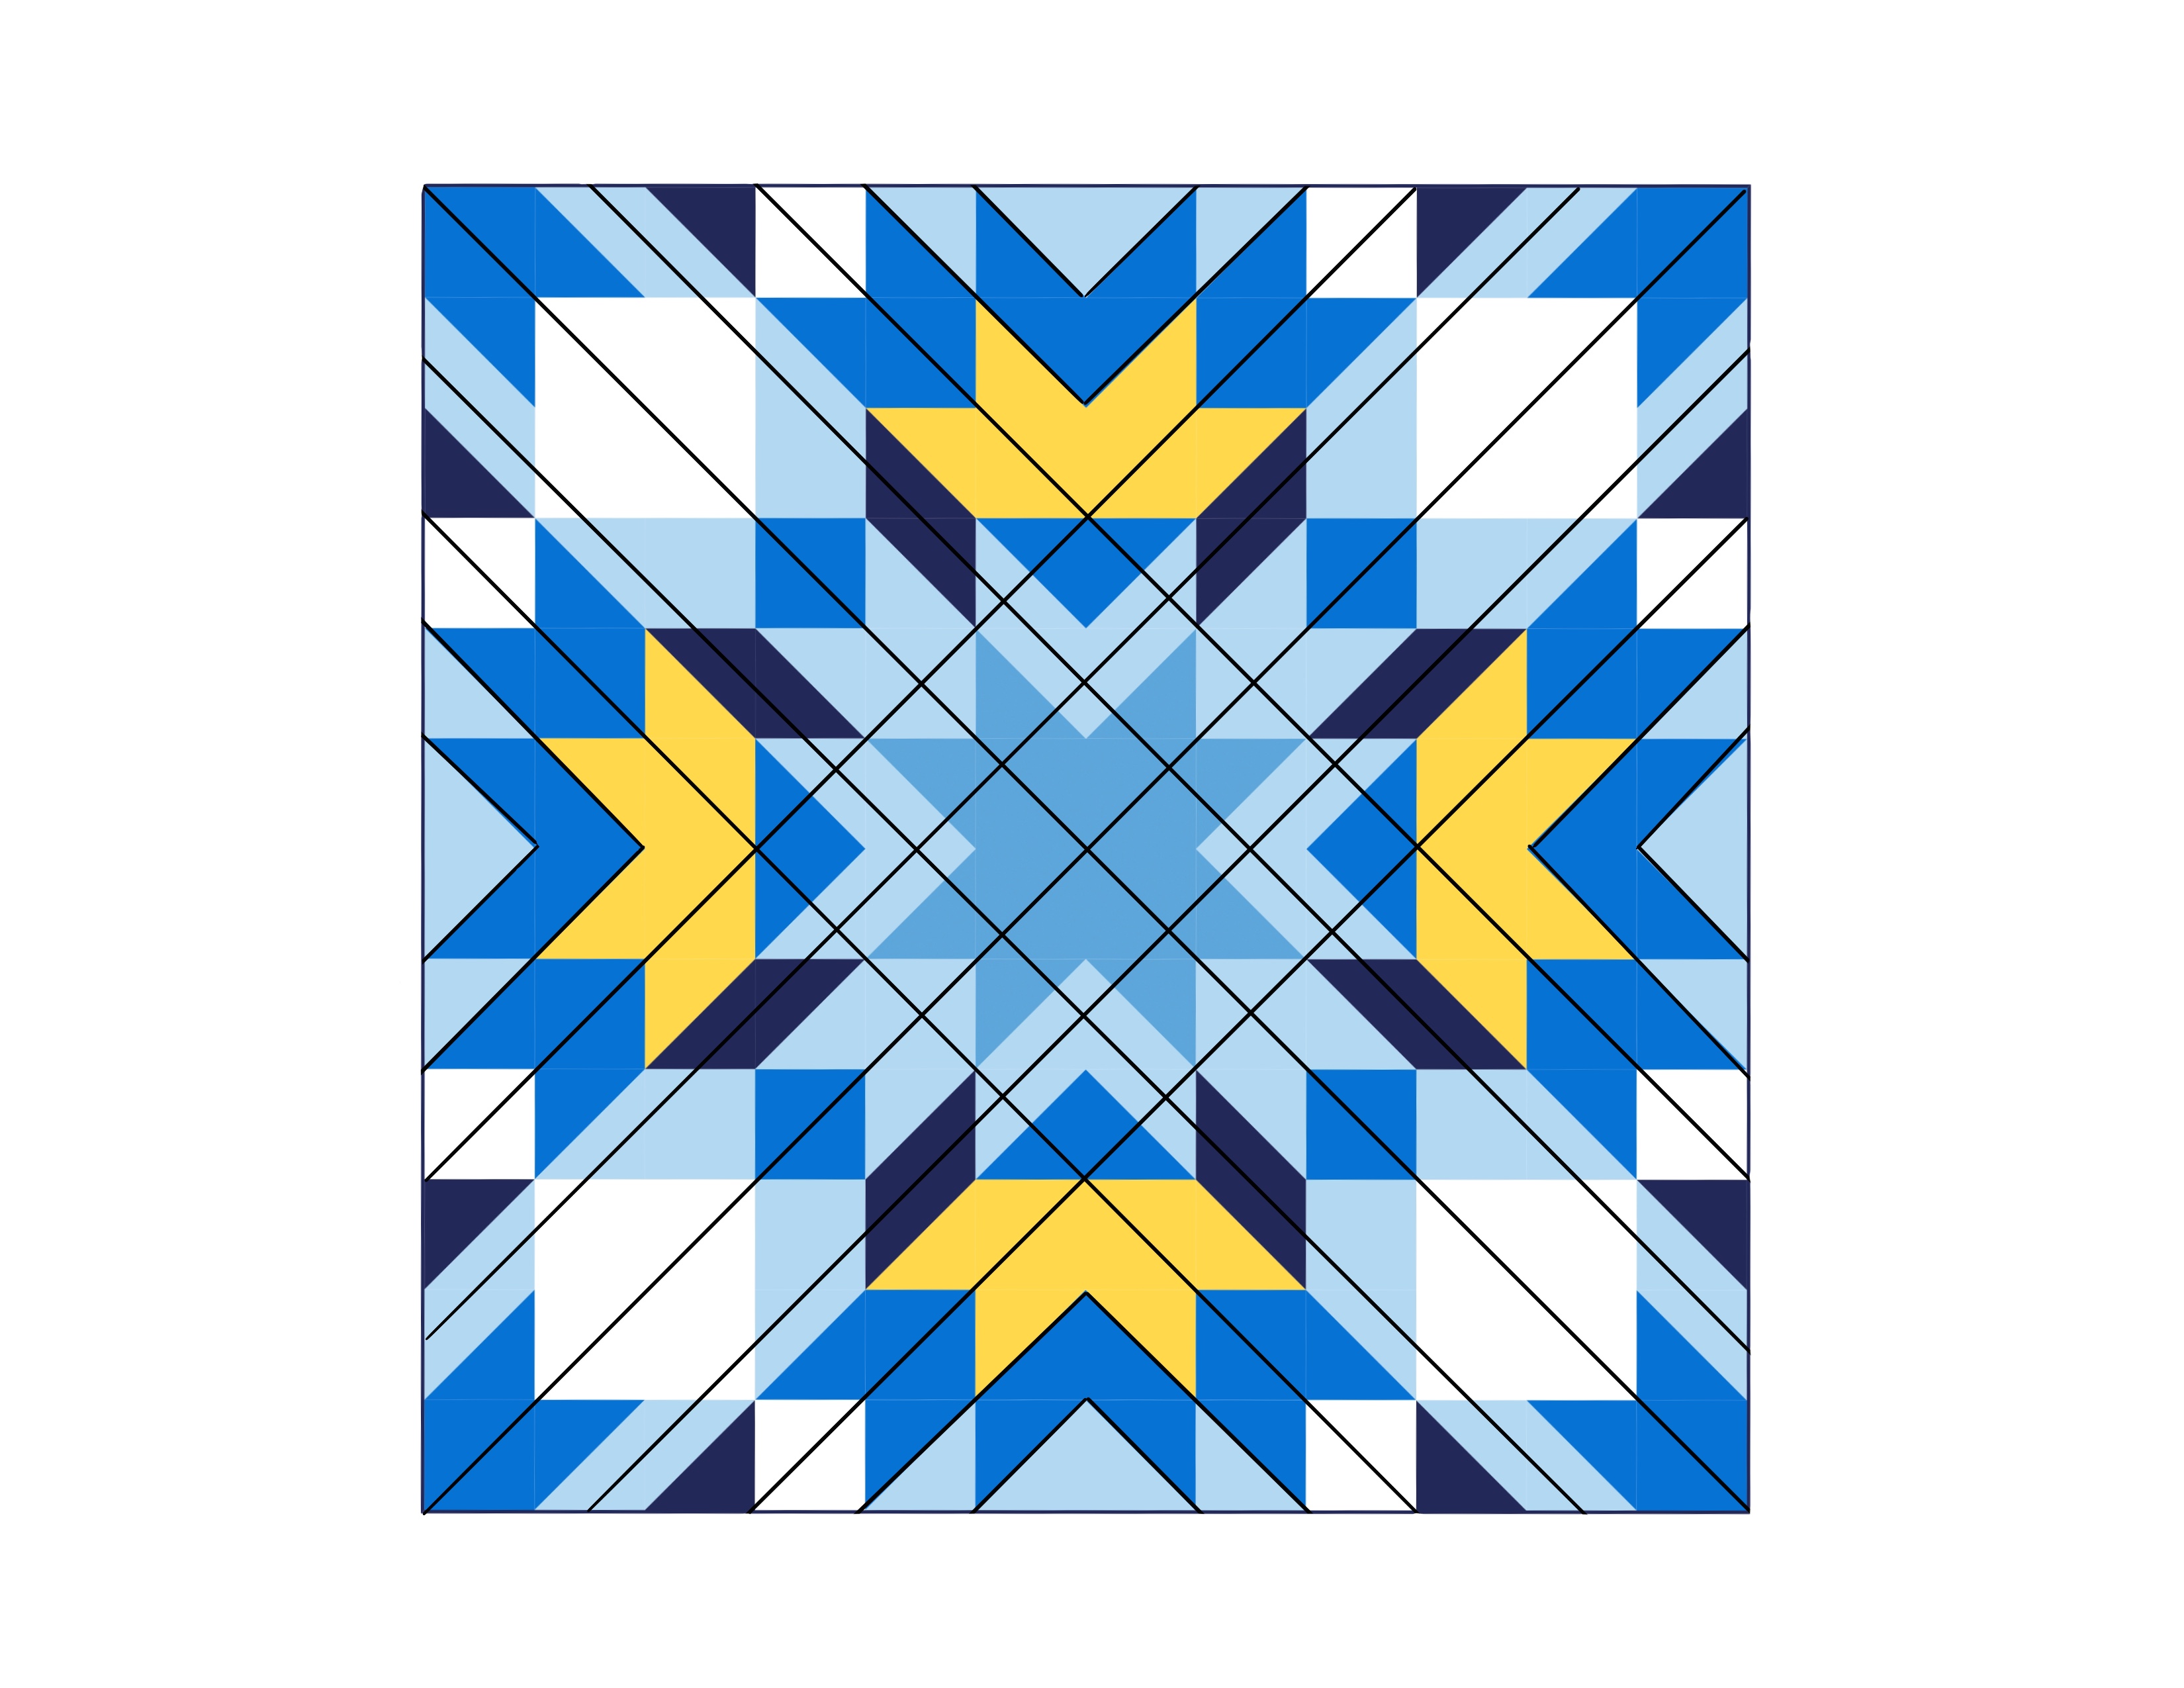
Quilt Assembly
Layout each of the sections as shown below. Sew each row row together. Sew the rows together to complete the quilt top.
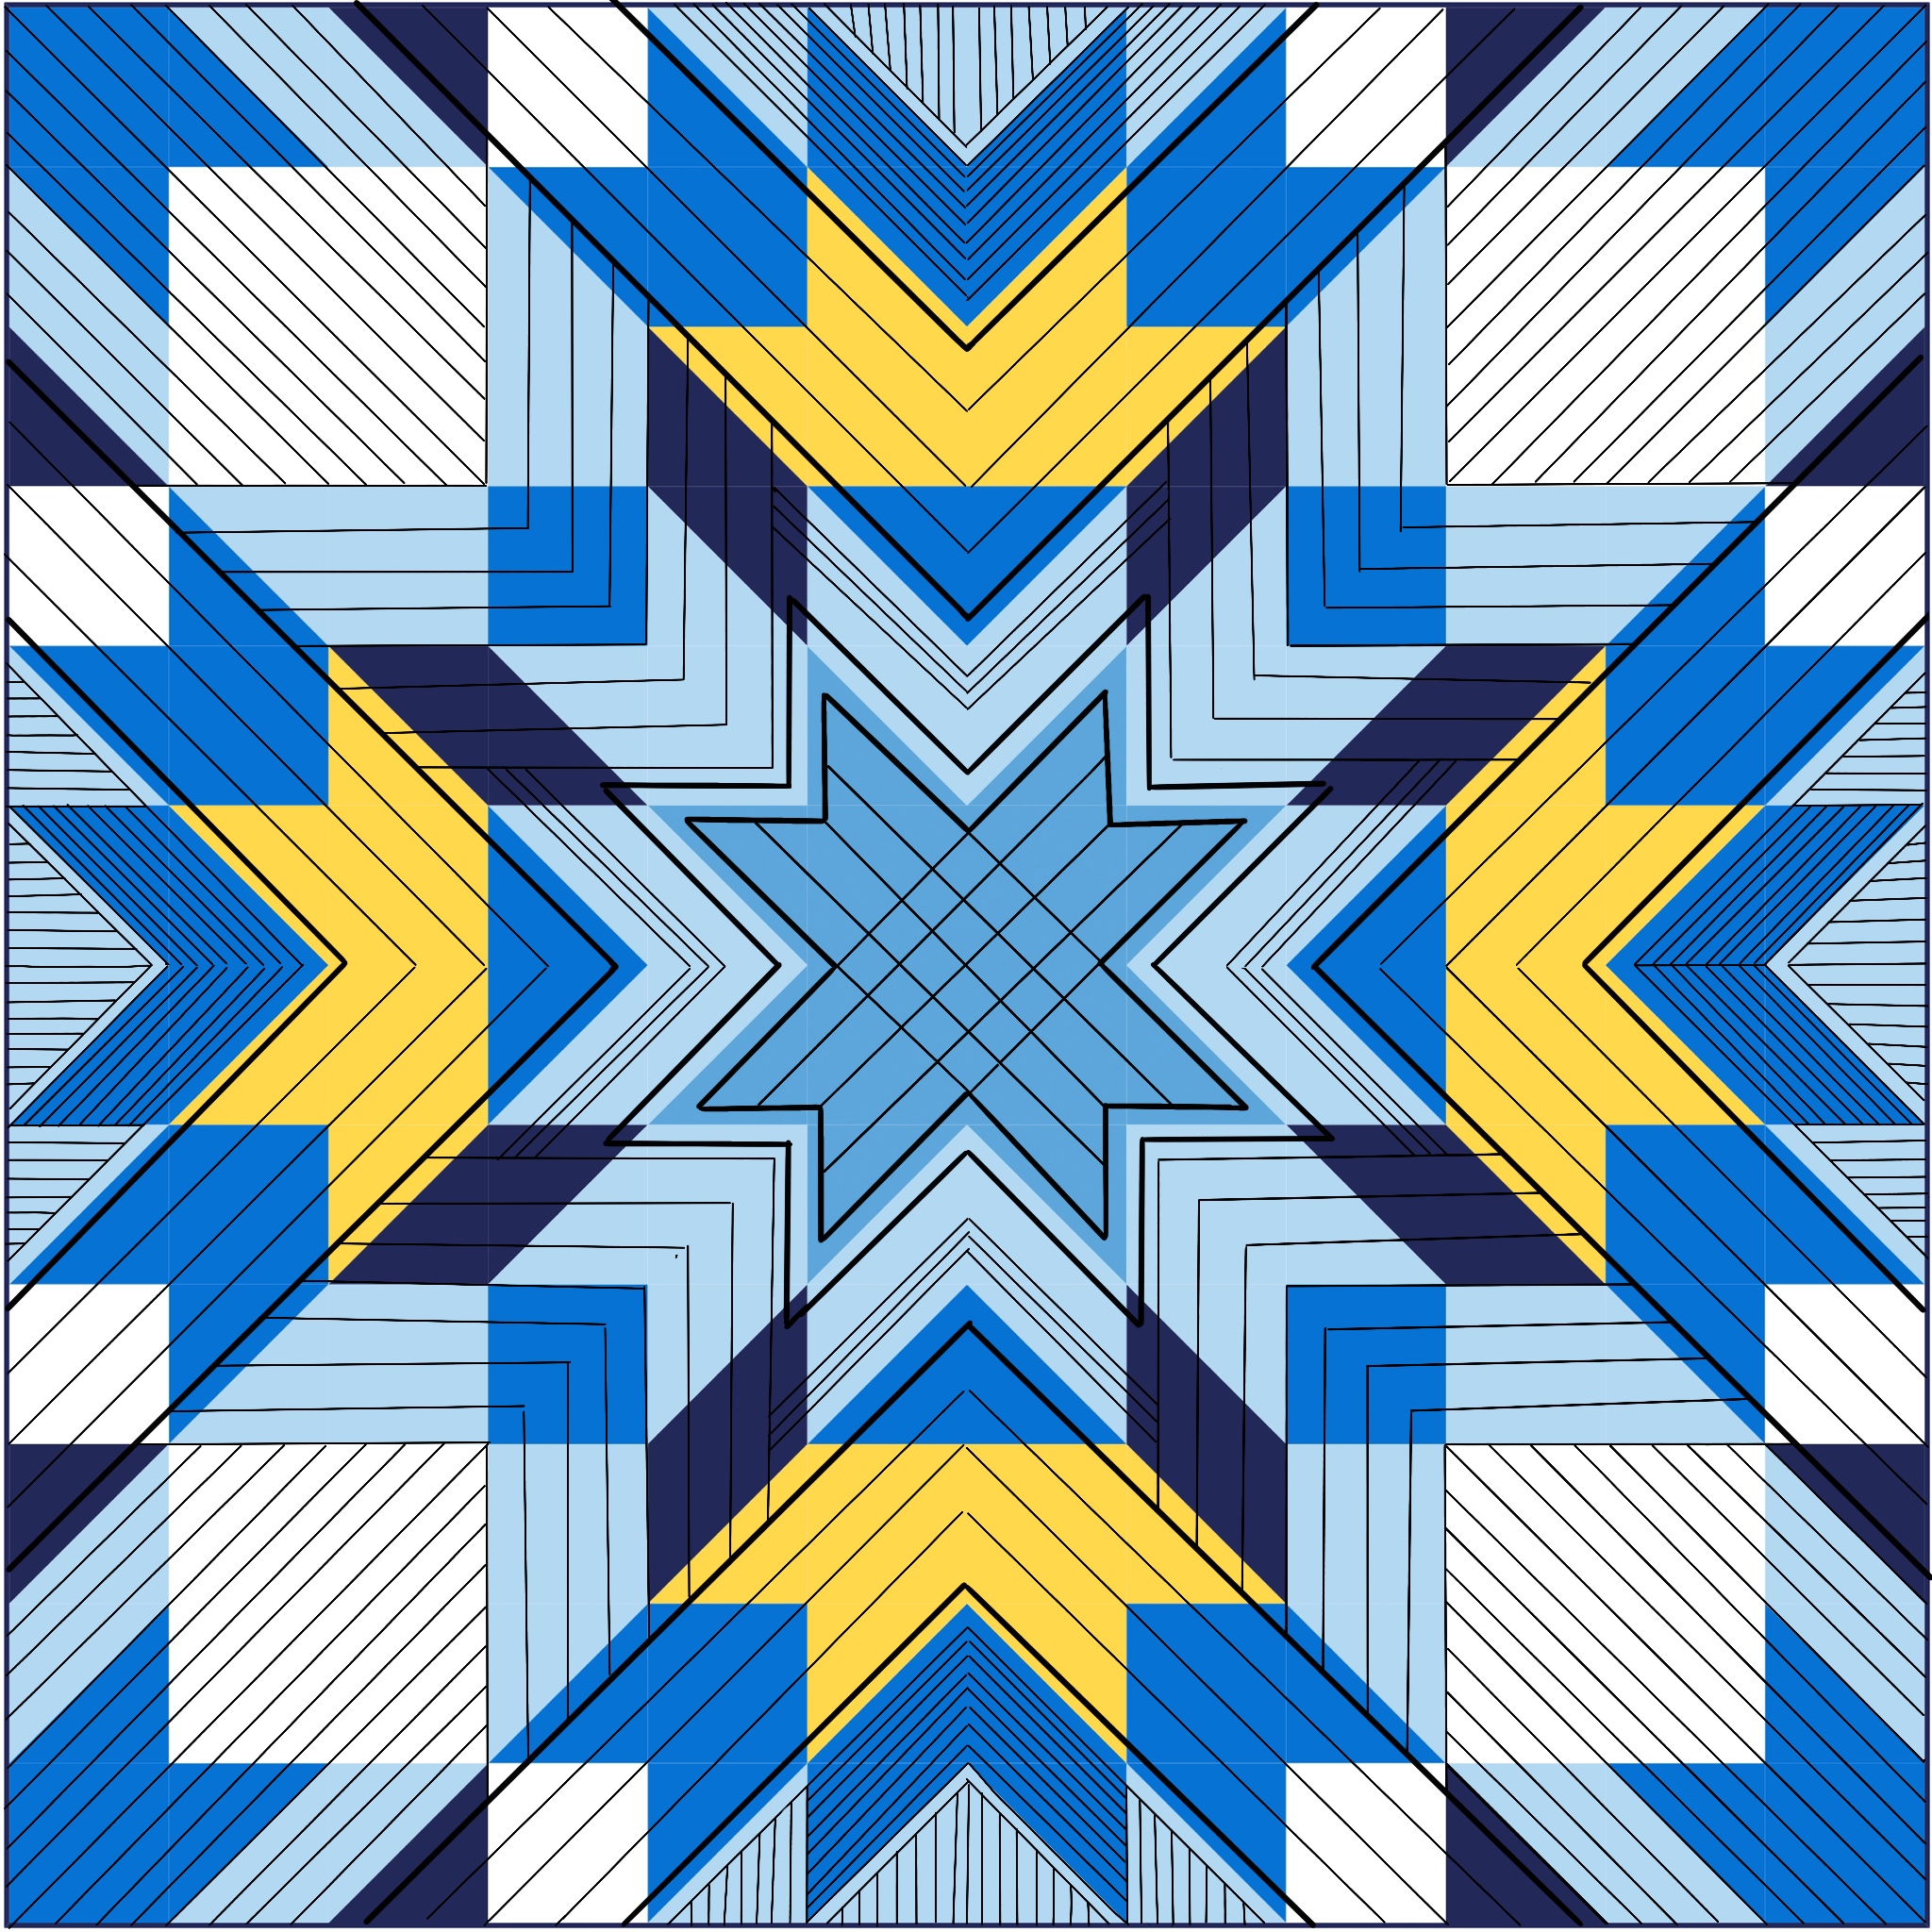
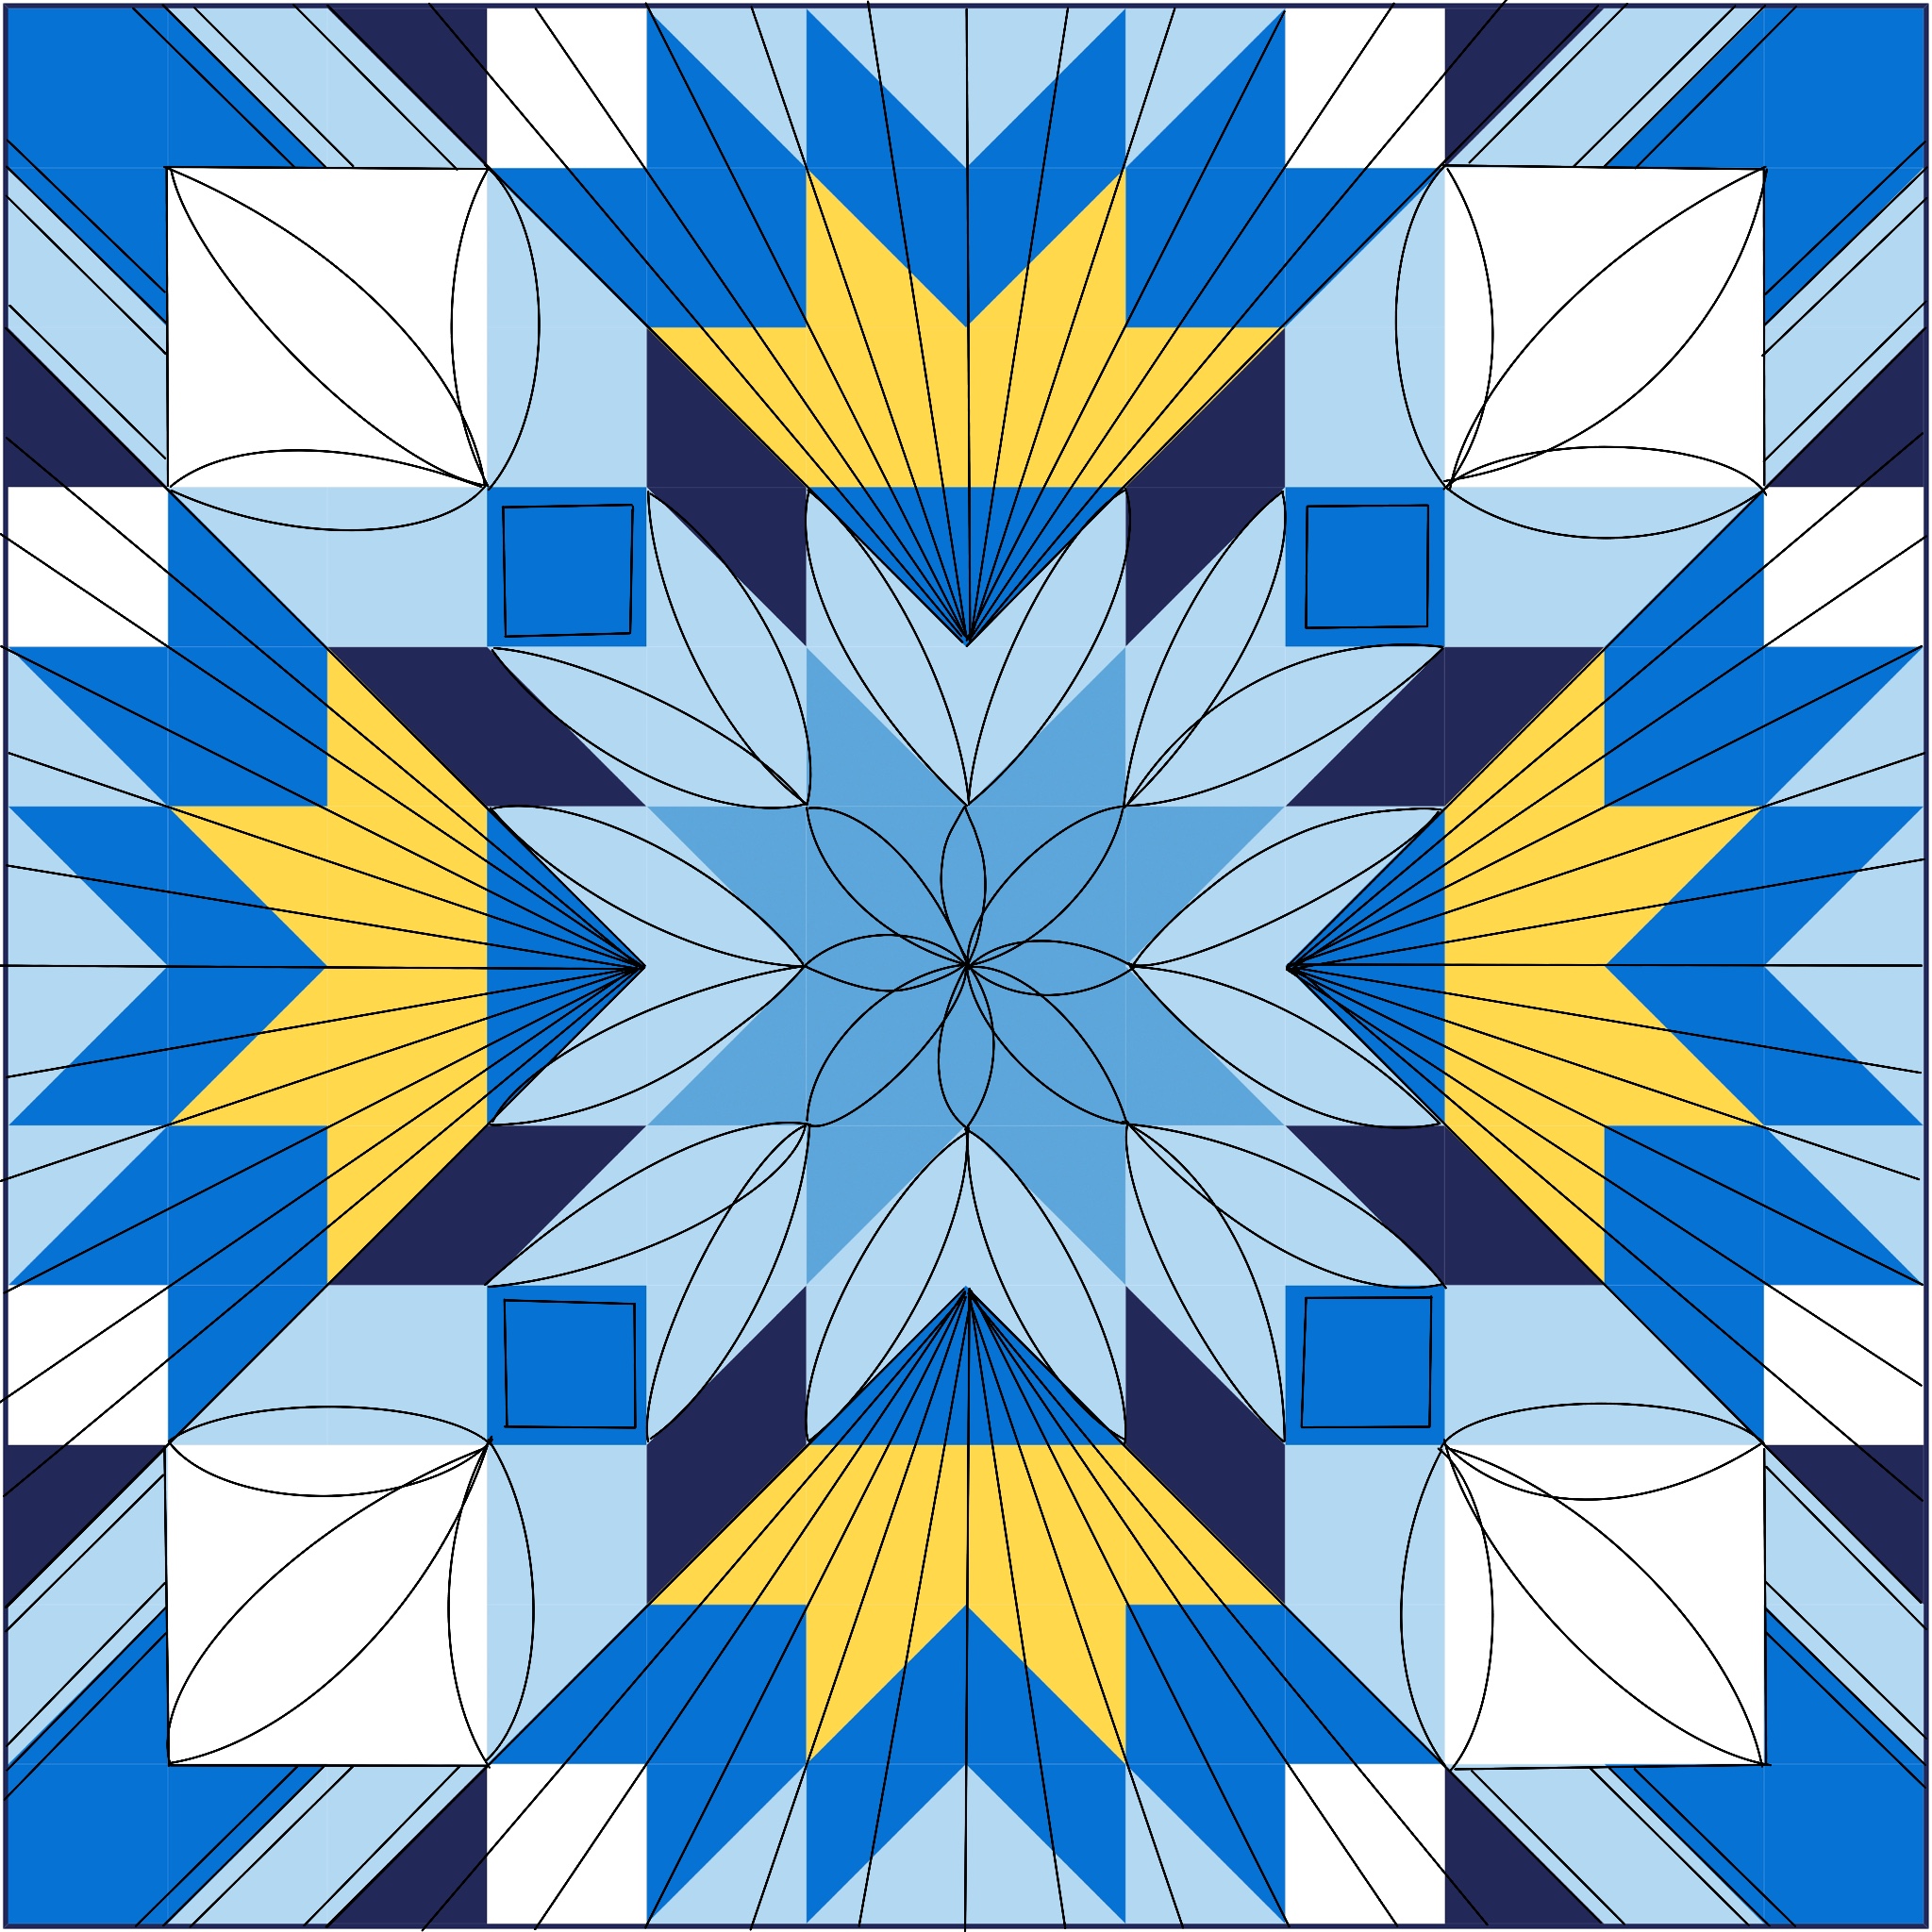
Quilting Ideas
In a quilt with as strong a motif as Summer Star, there are so many ways to emphasize the piecing with quilting. You can use all kinds of curves and fills, but you can create a lot of visual impact with straight lines. Experiment with echoing shapes, creating segmentation that isn't in the piecing, and density of quilting to emphasize different areas. Or make an X through the center of the quilt and echo it out. Try creating different distances between the echoing lines. Straight line designs are easy to quilt on a machine by using a walking foot, or they can be quilted by hand.
Above is a simple line design. Below illustrates a more complex straight line design.
This design utilizes both straight lines and curves.


Sign In
Create New Account